Week 6 happened to fall on Thanksgiving week. I’ll give you one guess as to who was in
charge of pies this year. Not a
brain-buster of an answer here. With my
pie project underway, I was more than happy to volunteer. I had originally planned to make one of the
pies a pumpkin, but when I learned that only one or two people really cared for
pumpkin pie, I quickly changed my plans to engage a few more of the family in
pie-tasting. The short order: 1
AppleRaspberry Crumb Pie and 1
Nutter Butter Frozen Peanut Butter Pie.
The
Apple Raspberry Crumb Pie recipe comes from the
Fall
2007 Betty Crocker Fall Baking magazine (the little magazines sold at the
checkout stand at grocery stores). This
was not a new pie for me to make, so I already knew what to expect and I tell
you, it did NOT disappoint. Last
Thanksgiving when I made this pie for my family, I used Grandma’s oil
crust. This year to mix it up a little,
I used the basic flaky piecrust recipe from Real Simple magazine.
 |
| The beginnings of Apple Raspberry Crumb Pie |
By using the basic flaky piecrust recipe, I was able to make
the crust of the pie the day before Thanksgiving, cover it with plastic wrap
and keep it refrigerated overnight, taking some pressure off my time restraints
on Thanksgiving Day. When I got up on
Thanksgiving, I sliced up the apples, tossed the apples in some sugar and
spice, and was ready to fill my prepared piecrust.
 |
| Sweetened apples... yum! |
To fill the pie, I added the sweetened apples as a base
layer. Then, I topped the apples with
raspberries. With the raspberries in
place, I crumbled almond paste over the top of the raspberries. Finally, I capped off the pie by sprinkling a
crumb topping, consisting of flour, sugar, butter, and almonds to the top.
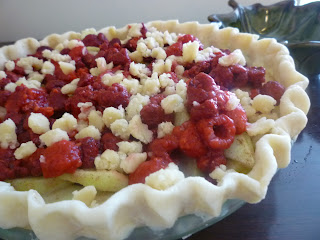 |
| Layered goodness: apples, raspberries, almond paste. |
 |
| Crumb topping mixed and ready |
The
Nutter Butter Frozen Peanut Butter Pie recipe comes from
the 2003 A Taste of Kansas City: Then and Now cookbook. This was the fastest pie I have made to date
(freezing time not included). The crust
consisted of crushed Nutter Butter cookies and melted butter mixed and then
pressed into the pie pan. The filling
was peanut butter, cream cheese, sugar, vanilla extract, and whipped
topping. Had I not been taking
pictures
between the various stages, this pie could have been ready to be put in the
freezer in ten minutes!
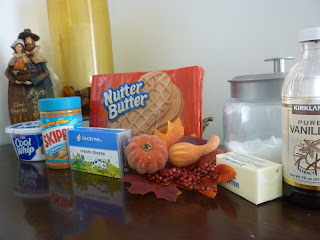 |
| The makings of Nutter Butter Frozen Peanut Butter Pie |
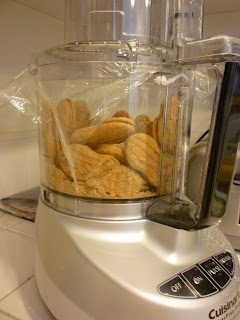 |
| Making Nutter Butter crust |
 |
| This may look like a crumby crust, but don't be deceived! |
How did these two very different pies turn out, you
ask? Divine! I am not a great fan of peanut butter (nor am
I a foe), but the
Nutter Butter Frozen Peanut Butter Pie was a delicious peanut
butter pie. The next time I make this
pie, I will drizzle a little chocolate on the plate, as the recipe
suggested. The pie was relatively rich,
so I would also suggest a cup of coffee or a glass of milk to balance the richness.
 |
| Nutter Butter Frozen Peanut Butter Pie |
The
Apple Raspberry Crumb Pie was nothing less of superb for
me. Throw a few of my favorite fruits in
a pie crust with almonds and we are already on the right track. Throw in a little almond paste… ooh, need I
go on? This pie was awesome.
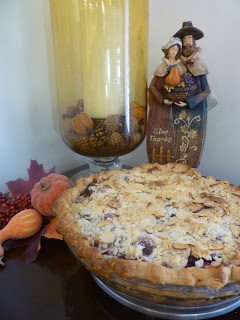 |
| Apple Raspberry Crumb Pie |


